
Printing
Set up QZ Tray for thermal printing
Use QZ Tray when your 80mm thermal printer is connected by USB to a Windows PC instead of directly on Wi-Fi.
Updated May 29, 20266 min read
QZ Tray is RepairNode's bridge for USB thermal printers connected to a Windows PC. The phone sends the print job over the local network to QZ Tray, and QZ Tray forwards it to the USB printer.
1. Install QZ Tray
- 1Download QZ Tray on the Windows PCInstall the latest Windows build on the same PC that is connected to the thermal printer.
- 2Launch it and keep it runningYou should see the QZ Tray icon in the Windows system tray before testing from the phone.
Download: https://qz.io/download/
2. Generate a trusted certificate
RepairNode uses QZ Tray trusted signing so the Windows host can verify the request source. Create the certificate pair from QZ Tray itself.
- 1Open Site ManagerRight-click the QZ Tray icon and open Advanced -> Site Manager.
- 2Create a new certificate pairUse Create New (or the plus button) so QZ Tray generates the certificate and private key needed for trusted signing.
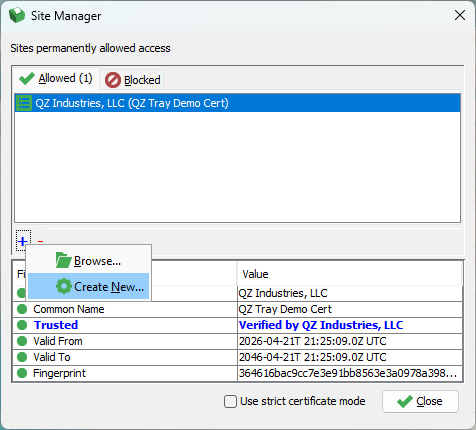
3. Find the files
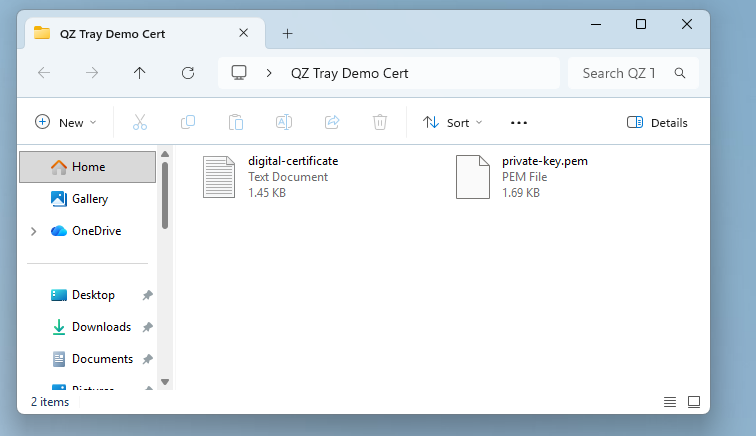
QZ Tray stores the generated files in its certificate folder. RepairNode needs two files from that folder.
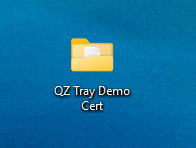
- digital-certificate.txt
- private-key.pem
4. Configure RepairNode
Make sure the phone and the Windows PC are on the same local network before you configure the Thermal Printer screen.
- 1Open Settings -> Shop Management -> Thermal PrinterThis is the shared thermal printer setup screen.
- 2Enable Thermal Printer and choose QZ Tray modeSelect QZ Tray instead of direct TCP.
- 3Enter the Windows PC IP addressUse the local network IP of the computer that is running QZ Tray.
- 4Use port 8182RepairNode uses 8182 as the QZ Tray default secure WebSocket port.
- 5Enter the printer name exactlyUse the same printer name shown in Windows Printers & scanners or load it from the in-app QZ printer list.
- 6Paste or import the certificate and keyUse Certificate Data and Private Key Data, or the file import buttons, to load the exact QZ Tray pair.
5. Validate and test
- 1Run Validate Trusted SigningRepairNode should confirm that the certificate and private key belong together.
- 2Run Test ConnectionIf the bridge is correct, QZ Tray accepts the request and the printer should respond.
- 3Save the setupSave before leaving so host, port, printer, and signing values stay stored on the device.
Was this article helpful?